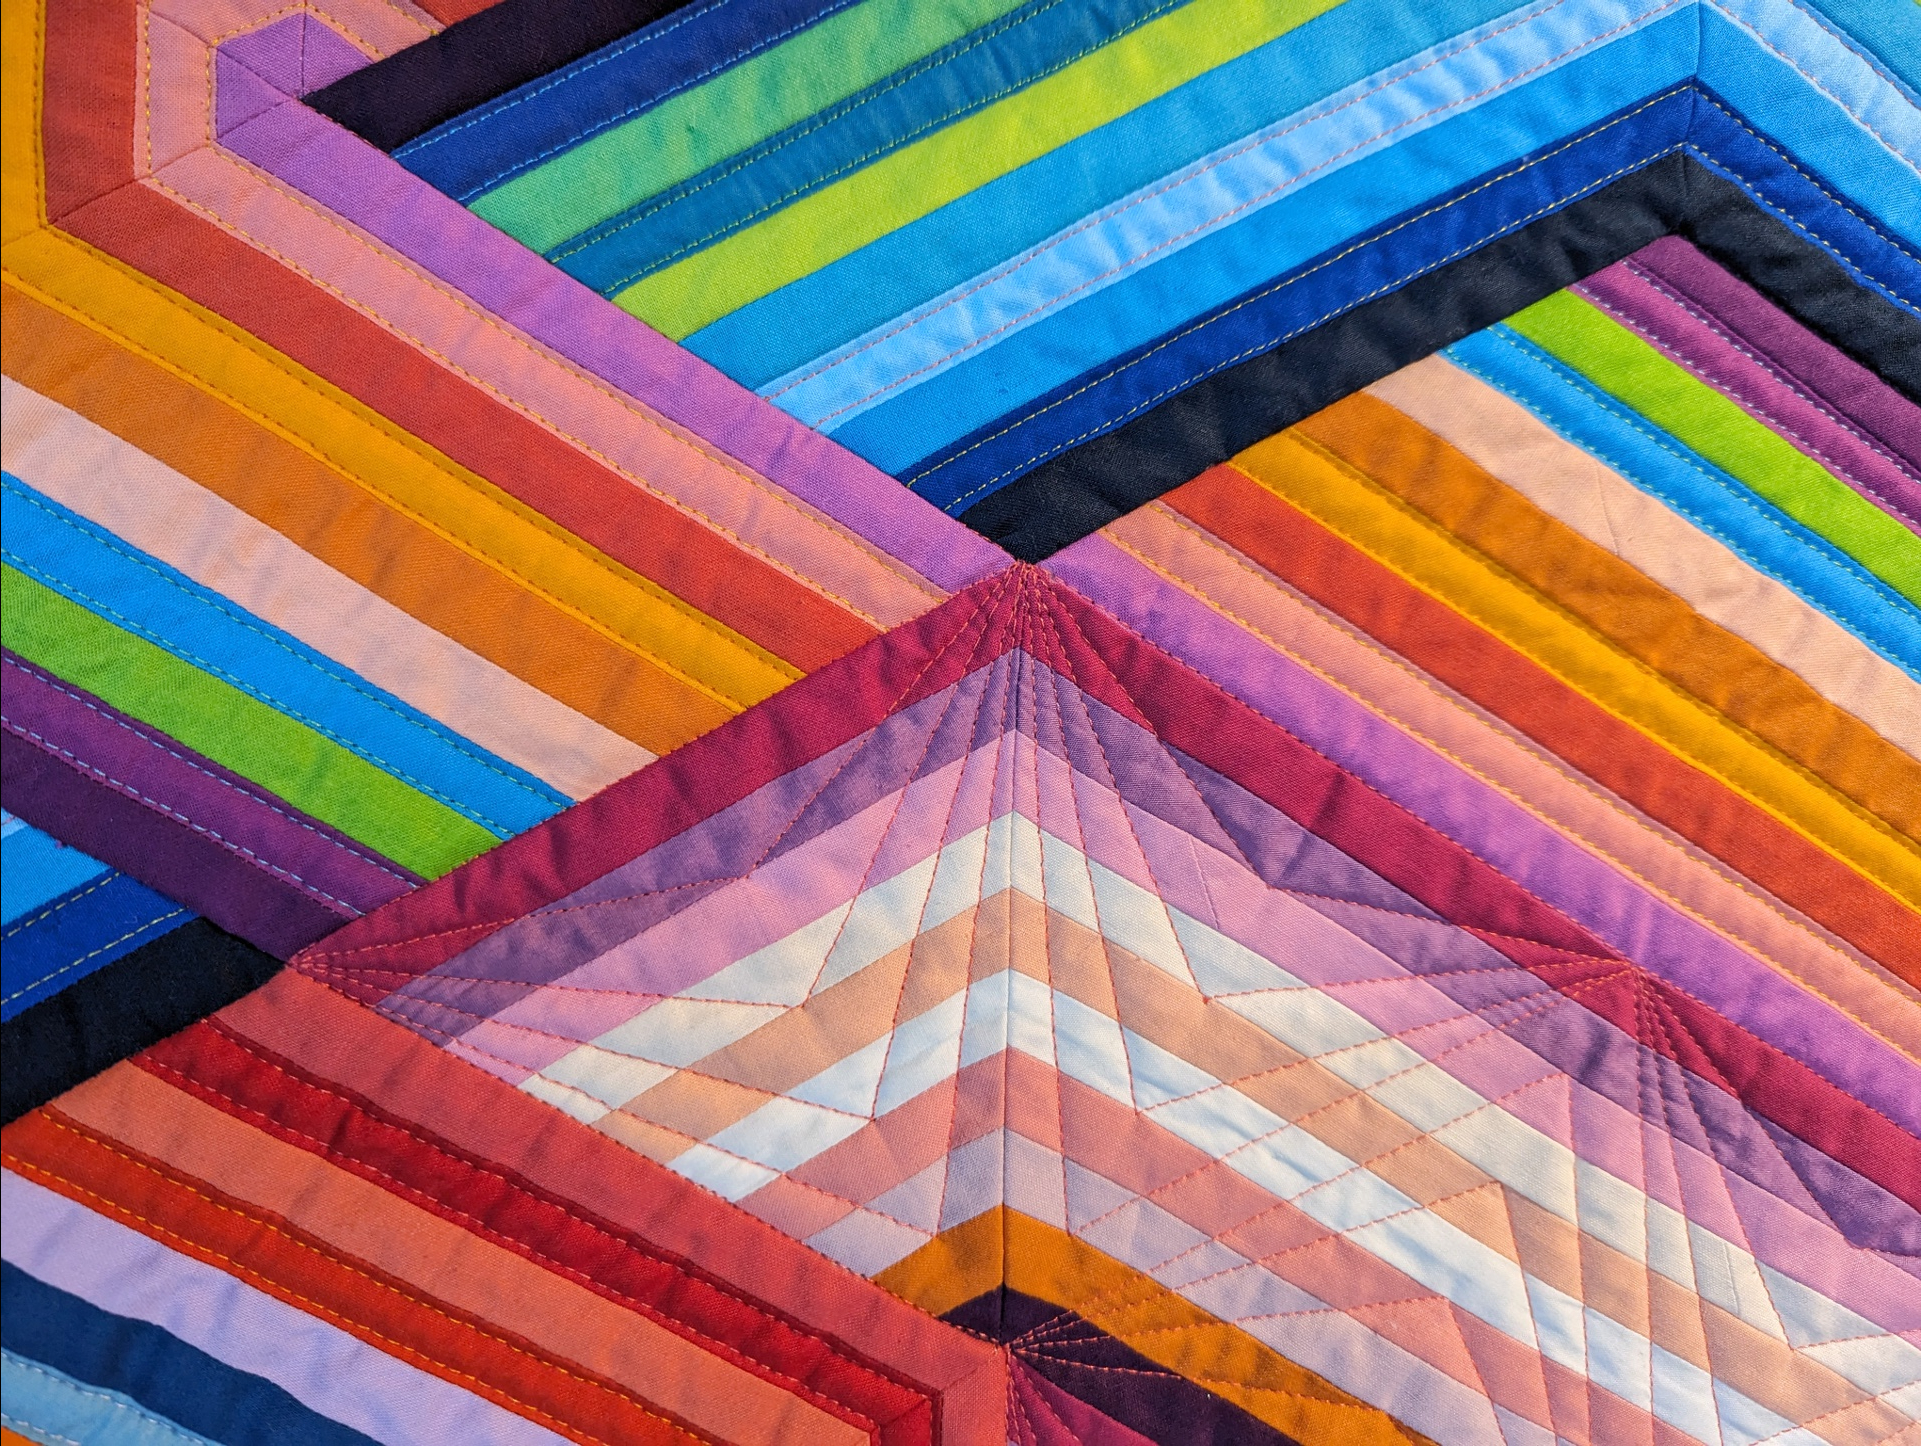
I’d love to share my design process for “stripey hexagon quilt” AKA Interplay, in case it helps you approach your designs in a new way. My first step in designing this quilt was recreating the layouts of some of the Adrian Martinus pieces in Prequilt. I had no desire to make a quilt using the exact layouts that I mocked up copying the Adrian Martinus pieces that I shared earlier. Those were purely used for exploration to see how the wooden designs would translate into 10-strip quilt designs.
Author: geekybobbin
I was on the Fussy Cutters Club Podcast!
Isn’t it great when likeminded quilty friends find eachother?
Recently, I chatted all things fussy cutting with Ange Wilson of Gnome Angel, author of Fussy Cutters Club and host of the brand new Fussy Cutters Club Podcast!
While Angie and I have “known” each other on Instagram for years, this was the first time we actually spoke. You’d never know it, though! We had such a great time talking about fabric and fussy cutting, and there were many MANY laughs!
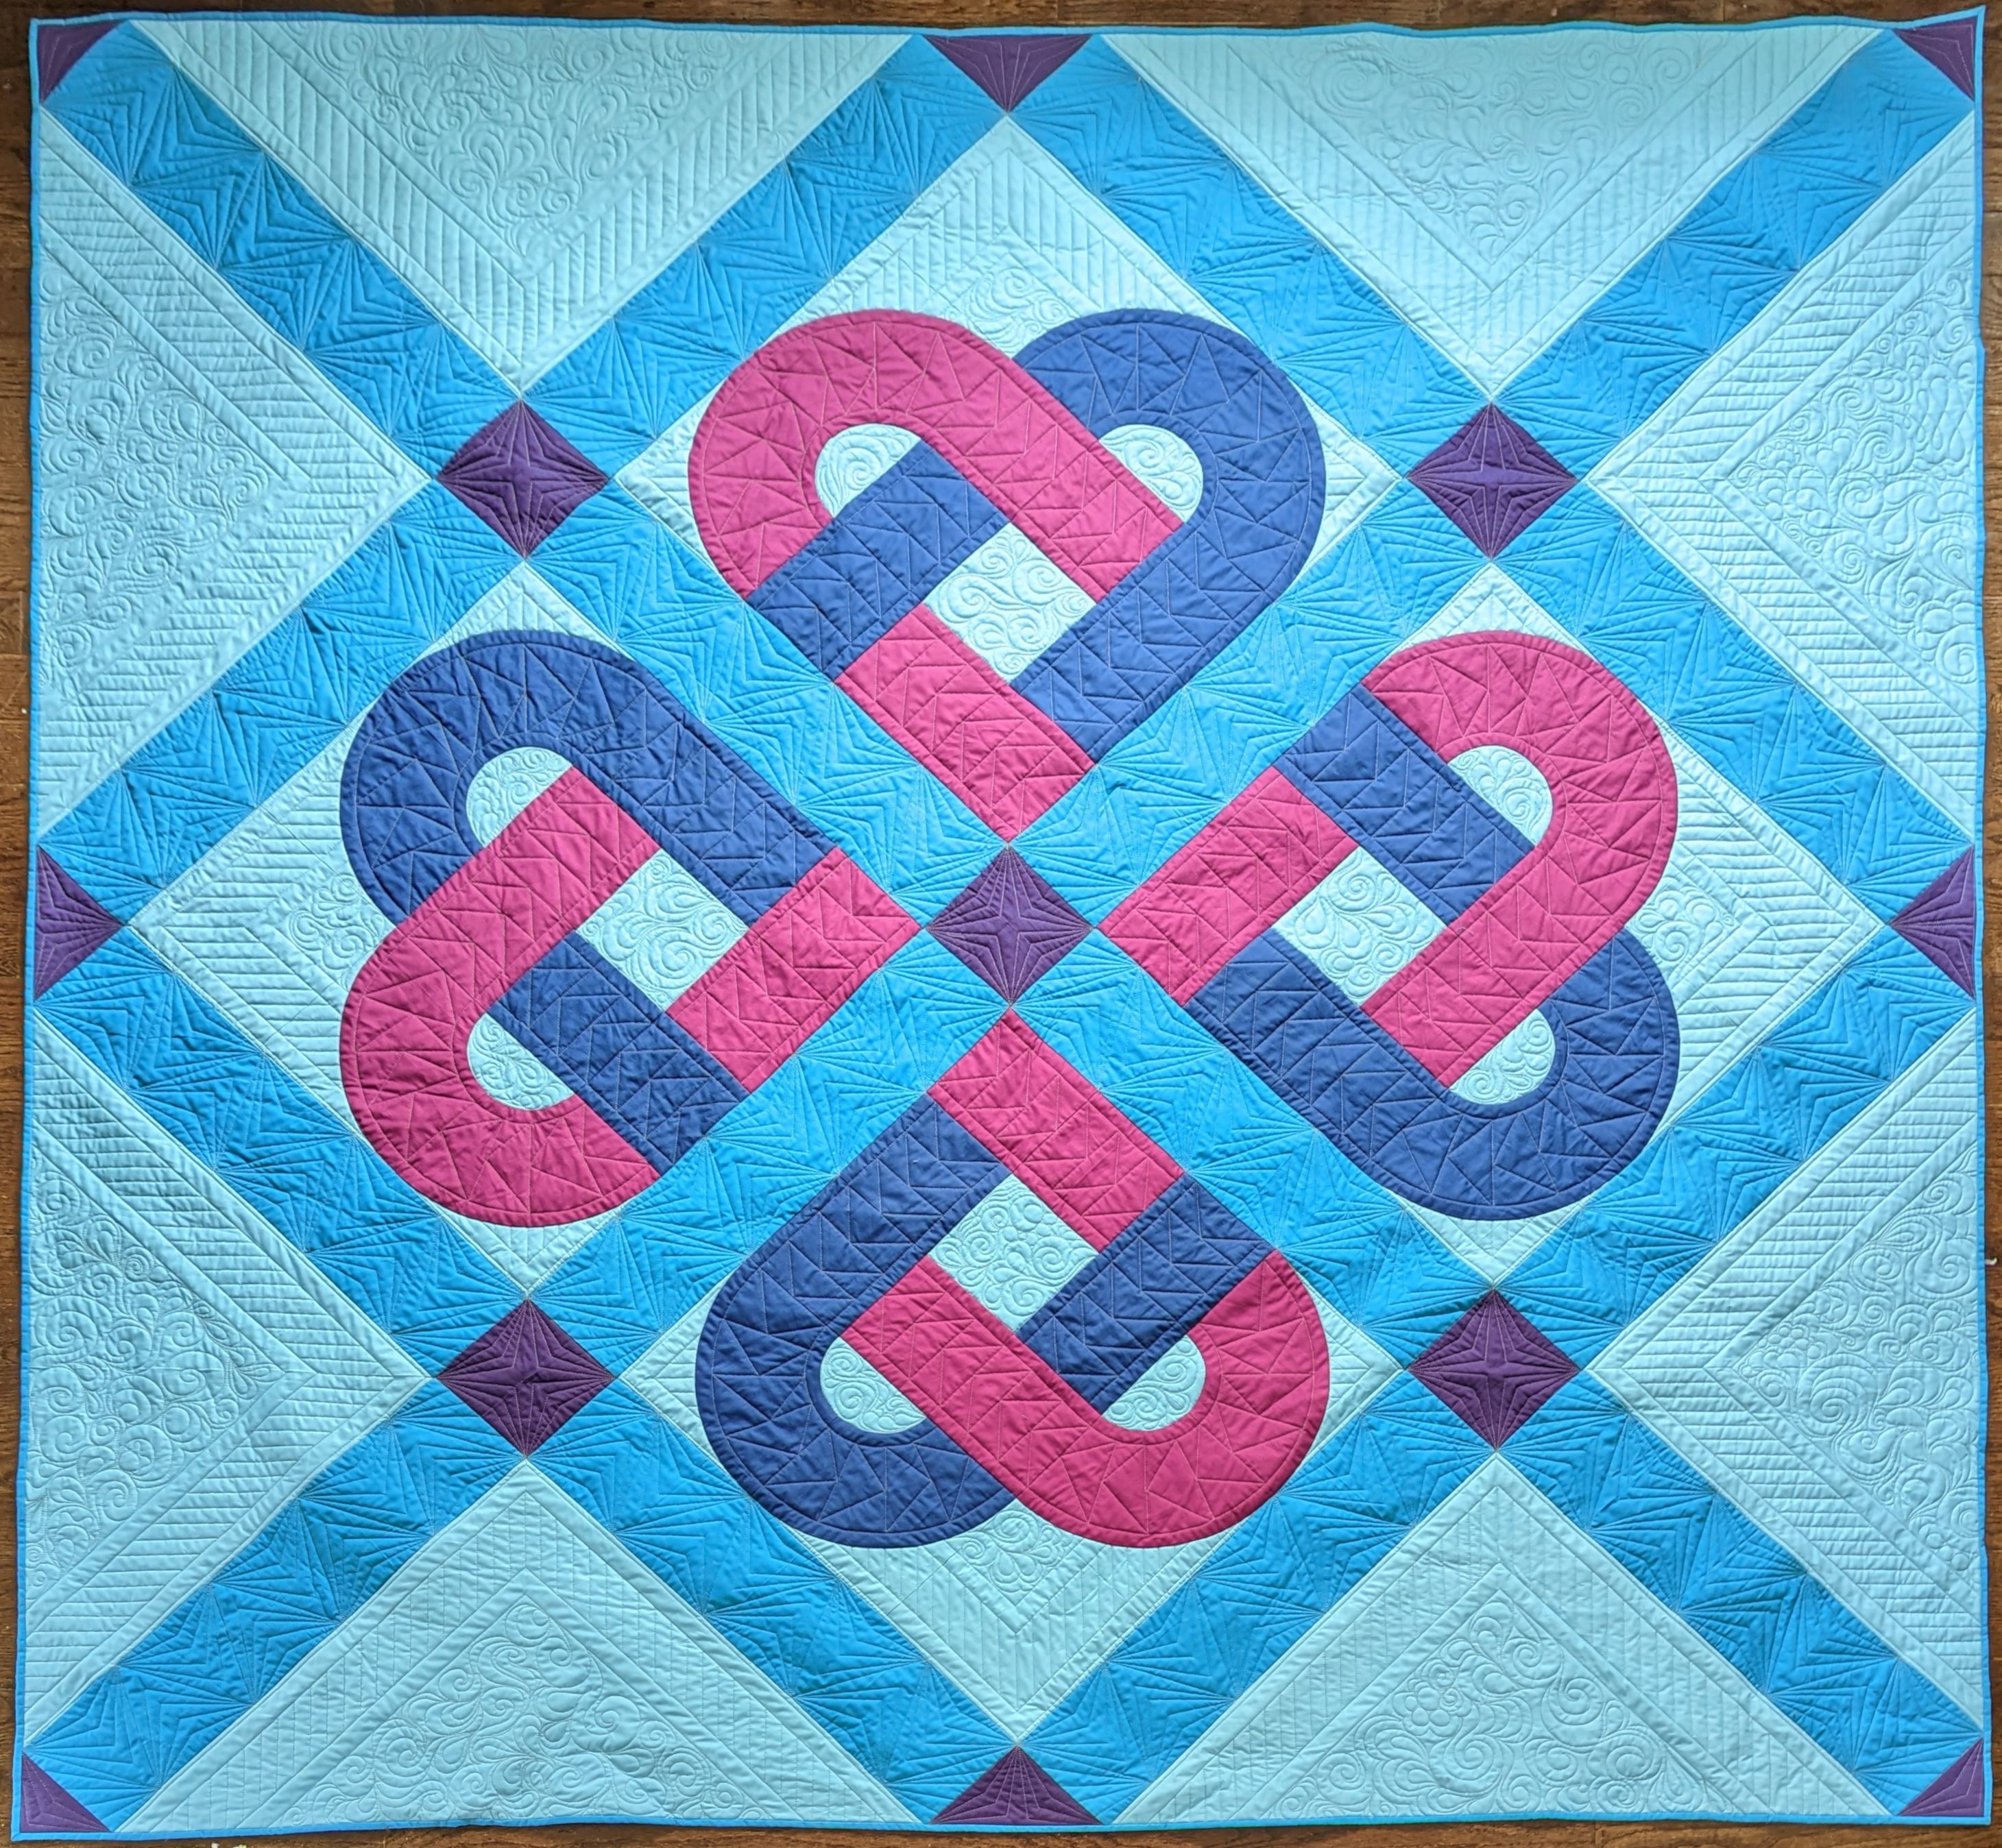
I Wove U Quilt – Queen Size in jewel tones
Who doesn’t love a heart quilt? I made my I Wove U quilt in the queen size using solids in a color scheme inspired by my logo. Measuring 94″ x 94″, it is an oversized delight ideal for a wedding quilt. In the queen sized version of the I Wove U pattern has four heart blocks set on point, blooming outwards from the center of the quilt. They are nestled in interwoven strips of sashing, punctuated by cornerstones. Made in solids, these hearts blocks and the surrounding sashing make for generous canvases to showcase some fun quilting.

Press for Success! The ULTIMATE guide to ironing quilt blocks
Quilters spend a lot of time with our irons! I get tons of questions about ironing and pressing, so here’s the lowdown on pressing your fabric, and a mini-tutorial on how to press your seam allowances.
For new quilters, it’s important to learn that pressing is NOT the same as ironing! When you iron a piece of clothing, you’re trying to smooth out wrinkles, usually with a light hand and lots of side-to-side motion.
When making a quilt, you want to press straight down and avoid any side to side pressure that might distort your fabric. Your objective is flat, undistorted fabric, a square block, and seams that lay FLAT.

Spring Cleaning: progress over perfection
The first thing to fall by the wayside when energy is scarce will always be cleaning.
So it’s no surprise that the sewing studio got even more out of hand than last year. All the systems in the world won’t keep a space tidy if you just don’t have the energy to put stuff away, or your temporary holding places have filled up and you aren’t up to the task of dealing with them.
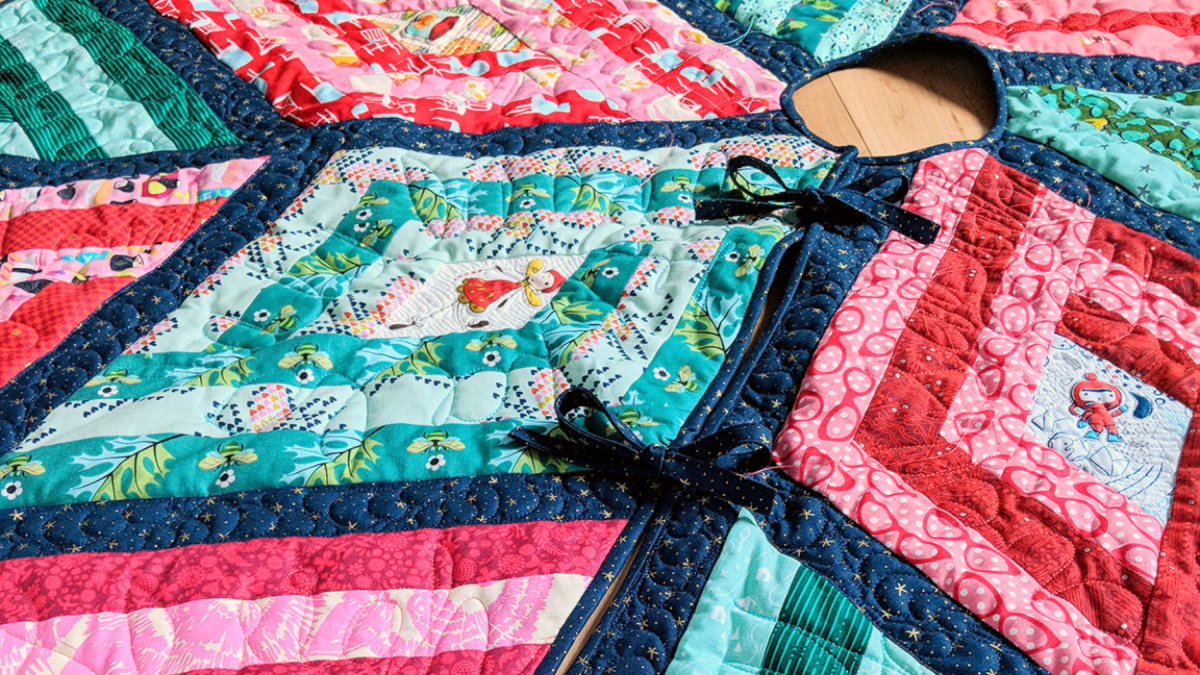
Arctic Vortex Quilted Tree Skirt – the scrappy large one
When I started my quilted Arctic Vortex tree skirt to go under my Christmas tree, I wanted it to feel like an eclectic collection of meaningful bits and pieces, with maybe a bit of filler to pull it all together.
I went through a dozen iterations of fabric pulls until I landed on the red, green, and navy colour scheme to work with the ornaments on my tree, while letting the fun and meaningful print fabrics in my stash shine.
No matter how I quilted these blocks, the busy fabrics would dominate the quilting.

Arctic Vortex Quilt Along Week 8
It’s time to bind our Arctic Vortex tree skirts and quilts!
Putting binding on a hexagonal quilt may seem intimidating if you’re used to only doing mitred corners when binding square or rectangular quilts. I’ll show you how to bind the 120° mitred corners smoothly and easily, then we’ll take on the 60° mitred corners where the quilt splits to make a tree skirt. Finally, we’ll use the stretch of bias binding to bind the inside curve of the tree skirt.
Step 1: Make binding
For going around curves, your best choice is always bias binding. Lucky for you, I have a brand new tutorial with the absolute fastest way to make as much bias binding as you need. Best of all, there’s no marking, no scissors, and only 2 seams to sew! Check it out!

Arctic Vortex Quilt Along Week 7
Can you believe we’re finally ready to quilt our Arctic Vortex tree skirts and quilts??
Whether you’re going fancy or keeping it simple, quilting is the most exciting part of the quiltmaking process. It’s the alchemy that turns it from fabric and batting into a quilt!
Step 1: Quilt As Desired
That’s really the only step. Or rather, I can’t break it down for you much more than that, since it really depends on how you’re quilting your quilt. If you’re quilting by hand, I’m of no use to you, since I’ve never hand quilted!
If you’re machine quilting, whether it’s a sit-down machine or a longarm, free motion or walking foot, here are a few tips that will help you have a bit more success, hopefully.

Arctic Vortex Quilt Along Week 6.5
Hold on a second. Just because you have a finished quilt top, doesn’t mean it’s time to start quilting! This week, we’re taking some time to plan and prepare first, so that the quilting goes a lot smoother. And yes, you can start quilting once you’ve taken these important steps.
Step 1: Choose your quilting method
How are you going to quilt your project? By hand? Using a walking foot? Free motion on a domestic machine? Longarm? Send it to a longarmer? Some combination of the above? This decision will influence all of the subsequent steps. Take stock of your preferences, skill set, budget, and available time.
Step 2: Plan your quilting
The eternal question: How Do I Quilt It? We could do an entire 8-week course on this subject (and hey, maybe I will some day!) but my favourite way to plan out my quilting is to draw on a picture of the quilt top. You can use your colouring page and pencils, a clear report cover with a whiteboard marker, or a photo of your quilt top and a drawing app. Try out a few different ideas and see what looks good and what feels doable in terms of density, complexity, and efficiency of movement.
If you haven’t planned the quilting for a triangle/hexagon quilt before, you can follow my design process as I worked through the quilting plan for Rebecca Bryan’s Solstice Modern Triangle BOM.
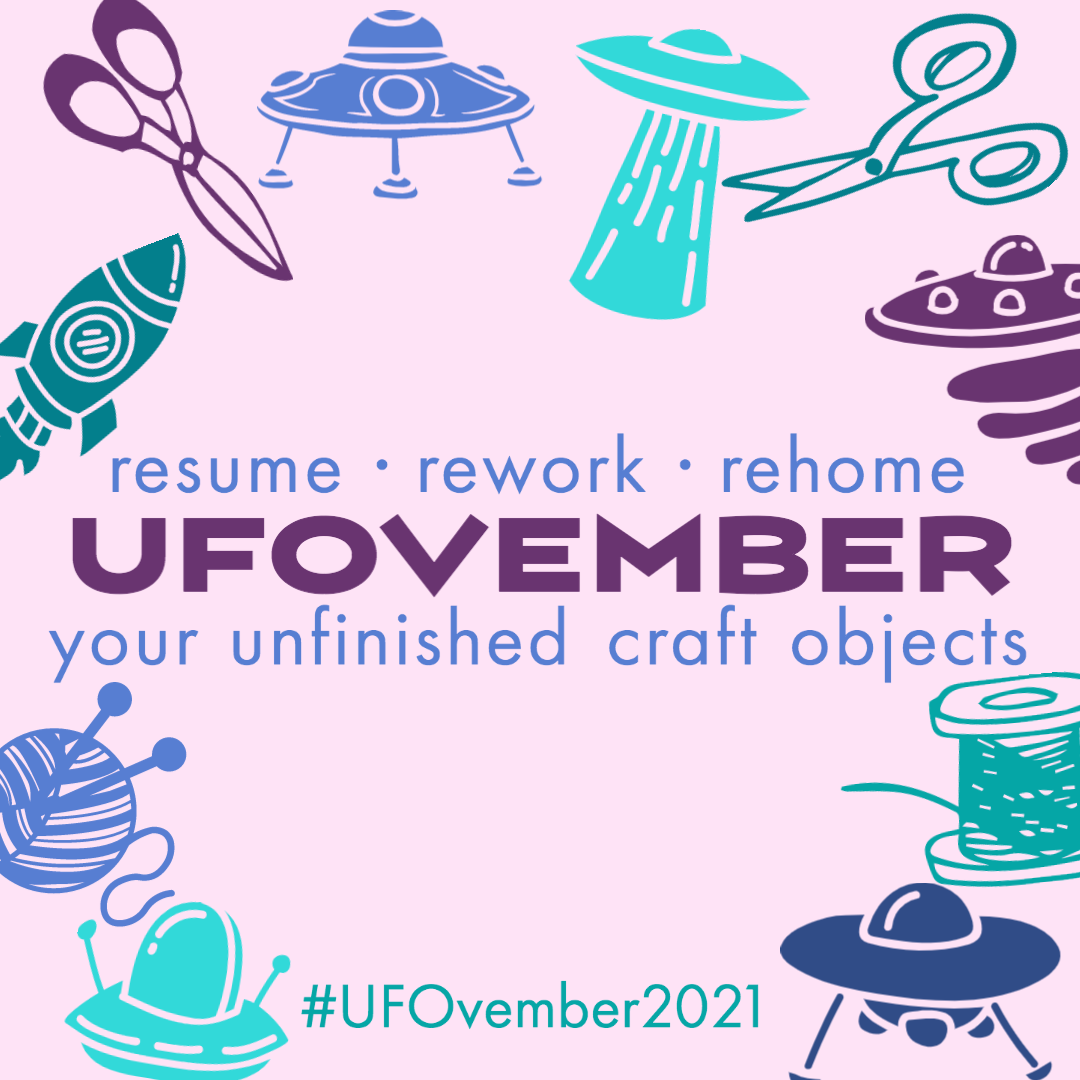
Welcome to UFOvember 2021!
They lurk at the back of our craft cupboards, taking up space and emotional energy: the UnFinished Objects.
You started the project with the best of intentions, but then you ran out of something: materials, time, passion for the project, motivation, direction (how do I quilt it????), the skills to do it justice…
You’ve invested precious time and money into the project, so you’re not about to trash it. With the pandemic putting further pressure on our crafty budgets, time, and energy, this is the perfect time to dust off those UFOs and help them back on their journey to completion (and potentially fast track some holiday gifting!).
Welcome to the 2nd edition of UFOvember! Over the next 30 days, I invite you to join me in examining our crafty orphans and deciding whether to Resume work on them as planned, Rework them with a Plan B, or Rehome them to another crafter, who can joyfully get them across the finish line.