In 2023, I did a lot of experimenting with quilty concepts, and not a lot of finishing of quilts. Those experiments were all warm-ups for when the “stripey hexagon quilt” AKA Interplay came charging into my brain, demanding to be explored. I’d love to share my design process for this quilt, in case it helps you approach your designs in a new way.
The Inspiration
If you’re not already following woodworker Adrian Martinus on Instagram, you should be! They make stunning pieces by upcycling skateboard decks.
A few months back, they posted a reel with a bunch of their wall art pieces, and I grabbed some screenshots as future inspiration.


I love the dynamic stripes created by laminating different colored decks into a striped material, especially when those stripes are cut up and recombined!
I used these as a jumping off point to explore designs for a quilt.
Design Exploration
My first step in designing this quilt was recreating the layouts of some of the Adrian Martinus pieces in Prequilt.


I started with “my” color palette, and then progressively added more colors. Then I used the randomize color feature in prequilt and stopped when I kinda liked what I was seeing. In the last one, I deliberately alternated lighter and darker values in some of the strip sets to mimic the plywood look of the original piece, while some of the strip sets maintained a bit more of a gradient, with lighter values in the middle, some with a bright strip at one edge as a bit of a border, and some with a darker strip at one edge for a different border. I liked the way these different styles of strip sets interact where they intersect with one another.
Design Evolution
I had no desire to make a quilt using the exact layouts that I mocked up copying the Adrian Martinus pieces that I shared earlier. Those were purely used for exploration to see how the wooden designs would translate into 10-strip quilt designs. I liked what I saw, I saw that there was potential, but I wanted to use what I learned from that experiment to create something completely new and entirely my own.
My initial attempts in this area were hitting the random rotation button in prequilt, then attempting to massage the results into something nice to look at.
These attempts were frustrating and unsuccessful, so I abandoned them in favor of starting from scratch.
I looked at what I liked and didn’t like about the earlier mockups, the interactions between stripes, and how the finished piece worked, then I deliberately started adding triangle blocks to get those effects. I started with a strong border going around the edge of the design (purple/pink/peach strips). I added a second set of strips over top of that (yellow/red/orange strips) extending to two edges to overlap the outer border.
Then I added 3 strong, elongated hexagons (red/blue/purple in the center; turquoise/green/lime to either side). I added layering to the red set to add movement. I had the yellow/red/orange strips weave in and out of these elongated hexagons.
Then I wove a final (blue/pink/too many colors) set weaving across the quilt.

Definitely unique. Definitely dynamic. But it really didn’t work.
I played with making it more symmetrical.

Next I tweaked the colors a bit. The border strip set needed to act as more of a background, so I lightened up most of the colors there, keeping a strong purple at the outer edge, and a strong fuchsia on the inner edge.
I
loved the way the turquoise/green/lime set really stuck out against the other, warmer strip sets, but I wanted to use that contrast in a different way.

Final tweaks! I didn’t love how the bottom corners of the outer elongated hexagons looked like they were kind of floating. I adjusted the turquoise/green/lime weaving situation to fix that. Which also gave it more symmetry.

This final layout had me totally jazzed and sewing around the clock!
Making the quilt

I made a cutting layout diagram in Prequilt by lining up all the similar strip set triangles to figure out how long each strip set needed to be, and what triangles/parallelograms/trapezoids I needed to cut from each. Many MANY strip sets were made, several pieces were cut incorrectly, dinners were skipped.
When it came time to put the blocks together into a quilt top, I glue basted to match up all those seams at the intersections, and I pressed my seams open where I wanted the strip sets to flow around corners. When one strip set went “under” another, I pressed to the side of the “over” piece, both to decrease bulk and to add a hint of dimensionality. (Read the blog post on pressing to see what I mean. This allowed me to stitch in the ditch.

The Quilting

I don’t think I’ve ever been so full of self doubt (and self sabotage) when it comes to quilting a quilt top. Using some leftover bits of strip sets, I tested out hand quilting, different styles of machine quilting, and still I wallowed in uncertainty for 2 weeks, until there was scarcely enough time to get it finished.

By that point, it was a matter of “finished is better than perfect,” and I just had to start.

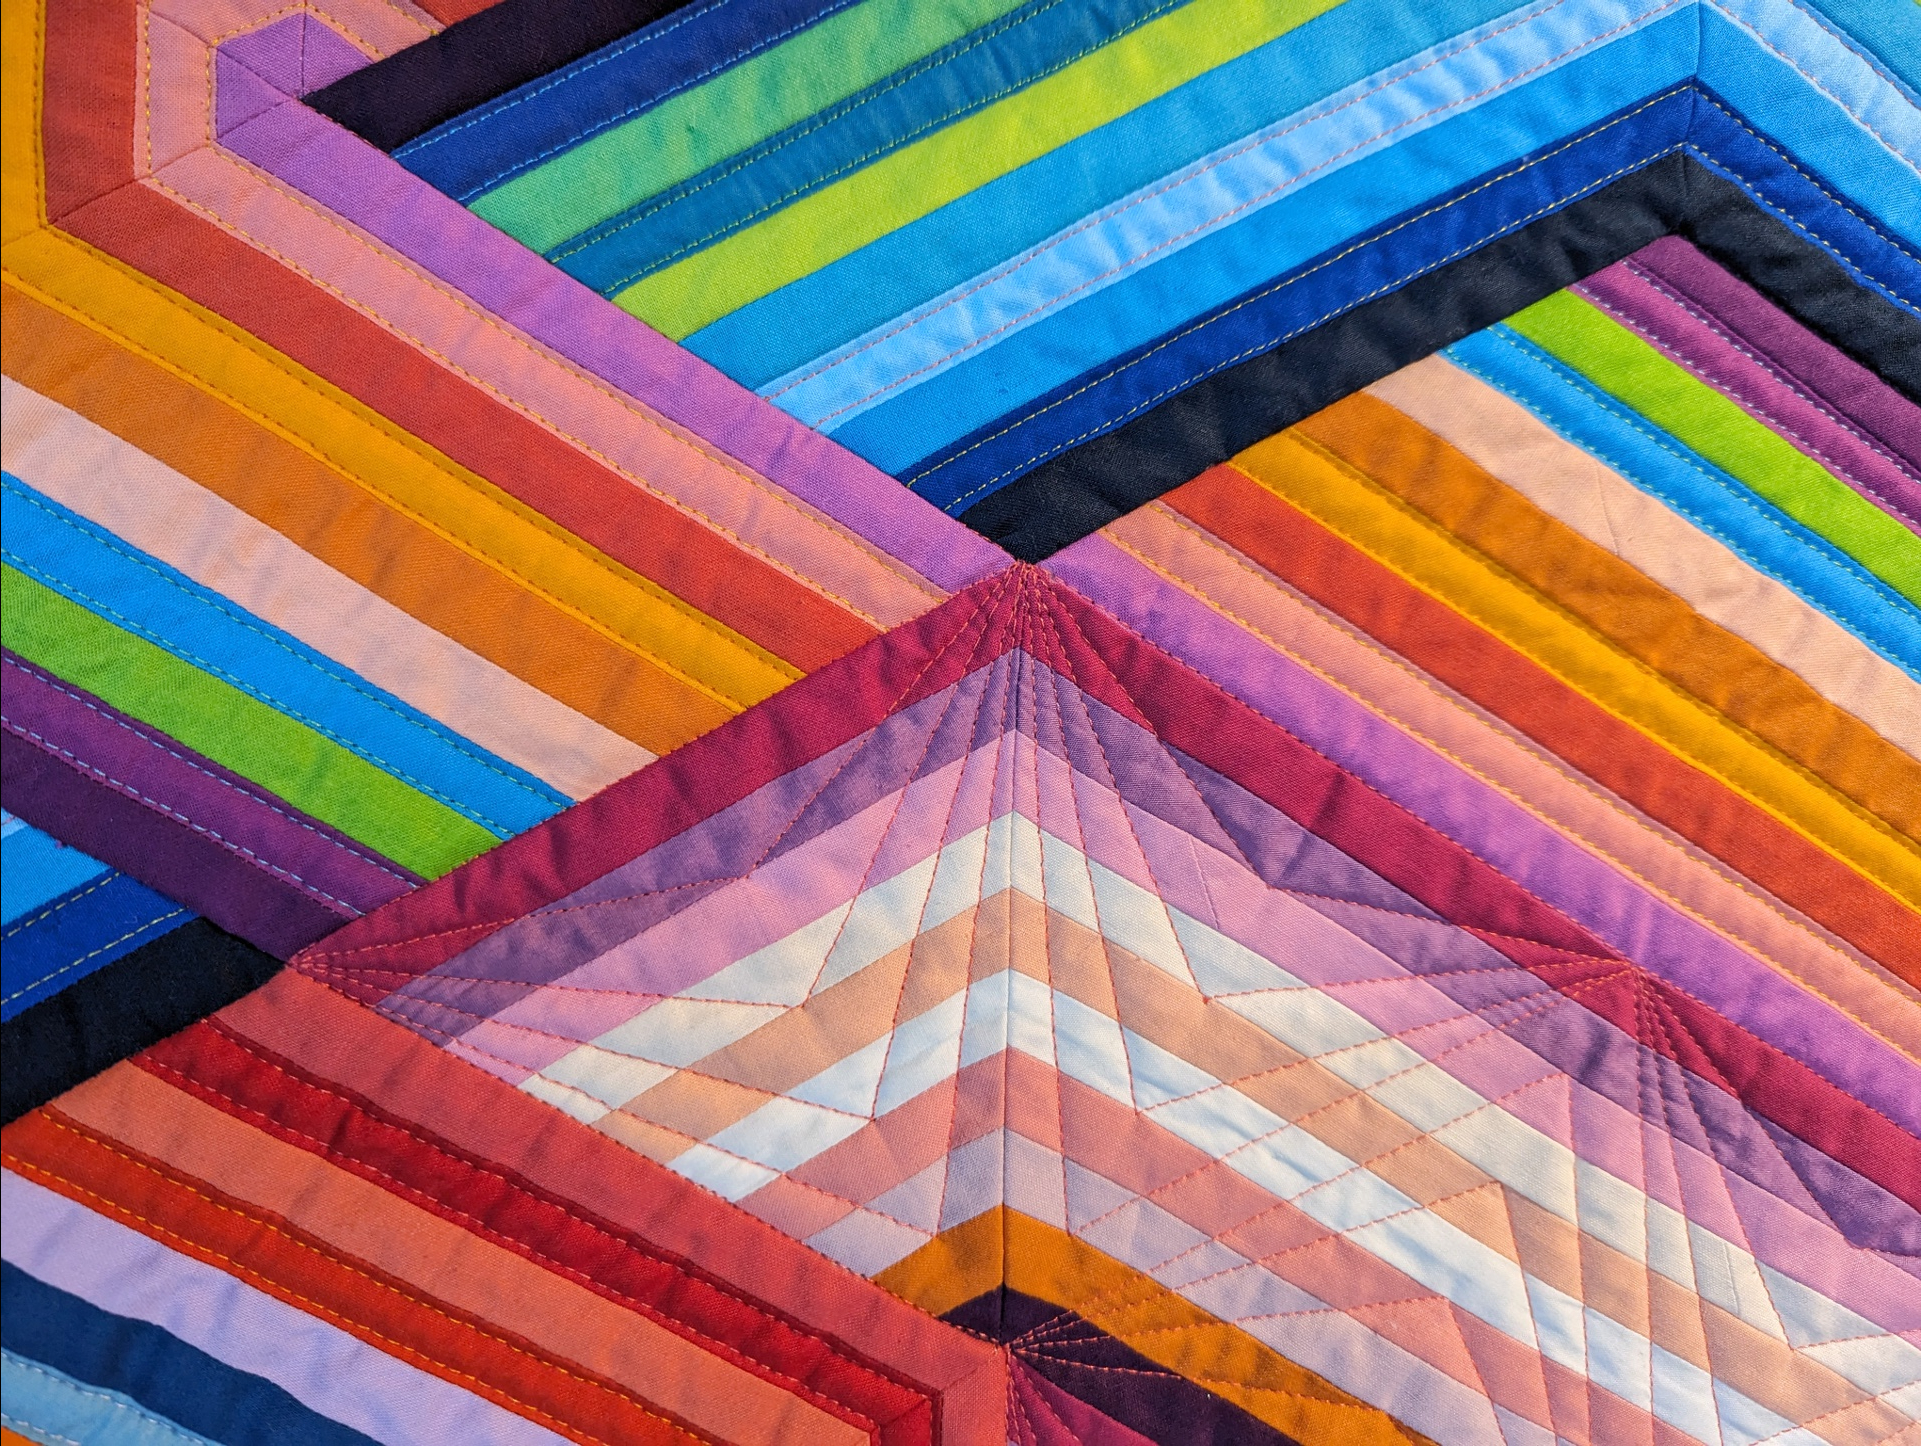
The finished quilt

Here’s what I wrote in the Artist Statement:
Interplay is a celebration of color and shape. Unusual color pairings create harmony and dissonance. The weaving hexagons play with symmetry, while the variations in the strip sets throw the symmetry into tension. Shifts in value and hue push and pull, attract and repel.
This original design was inspired by hexagonal woodwork art pieces created by Adrian Martinus, who uses upcycled skateboard decks. Their scrappy, multicolored plywood look inspired me to start with backing fabric trimmings and leftover bindings to build 6 strip sets of scrappy solids.
I literally would not have made that quilt without my friends in The Bobbin Bunch cheering me on, through the experiments and throughout the process of designing and making this quilt. If you want even more details on my design process and the inside scoop on future experiments, I’d love for you to join us.
Frankly, I think it might be the coolest quilt I’ve ever made! It’s currently hanging at QuiltCon. If you’re here, say hi to the quilt!

Wow! I love it. What a creative process you went through. Thanks for sharing.
Wow, what an inspiration! This is going to give me sleepless nights until I start doing something like that.